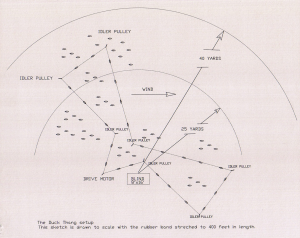
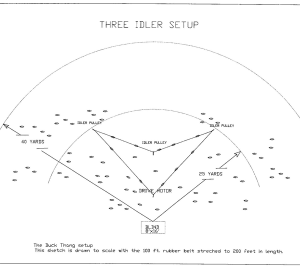
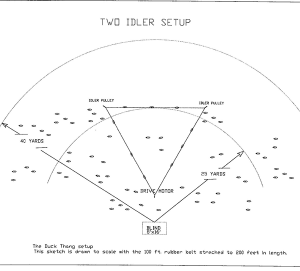
There are many ways you can set up the Duck Thang Motion Decoy System. On this page, we have four diagrams of how it can be used. You can set it up using the basic kit, or purchase additional idler pulleys and follow the diagrams to work the decoy spread with those. We have several diagrams on this page for you to use, and instructional videos also.
It’s best to begin by setting the drive motor post which has to be within the length of the power cord from the blind. We have found that removing the metal plates attached to the tee posts makes them easier to remove and adjust. We also recommend using the commercial post drivers rather than a large hammer. The pipe-type drivers will not deform the end of the post that the drive motor and idlers must slide over.
The next two posts should be placed approximately 30 feet in front of the motor stake forming an angle as shown in the sketches. The distances do not have to be exact but it’s important to have an angle at the drive motor to give the belt enough friction to drive.
The other posts can be placed in any pattern you wish to use. Next place the idler assemblies on the posts and straighten them if necessary. It will work best if the idler arms are parallel with the surface of the water. The rubber band can now be stretched around the idlers and motors as shown. Make sure the band is not twisted and that all the decoy tether loops are on the top side of the belt. It will probably be necessary to move a post or two to get the belt tensioned. After attaching the decoys, turn the motor on and check to make sure the belt is not slipping on the drive pulley. If it is, move a post to increase the tension.
The belt moves continuously, and in time the swivels and tethers will wear out. When that is first noticed, we recommend replacing all of the tethers and swivels. We have found that the PVC decoy cord and metal crimps made for that cord work the best. If the belt should break, or if you should need to cut it (to go around an obstacle or shorten it), use super glue for the repair. Clean and dry ends and overlap approximately six inches and in a minute or two, it’s ready to go.


